Tag Archives: Azure

Retry Failed Connections in Talend

In a project we are using Talend to load a lot of data each night and we are experiencing randomly getting “Connection does not exists” error messages during our data load. This can happen at any time both during the connection phase, and so far we have been unable to see any real signs of why it is happening and when. In addition this leads connection reset often leads to our data being corrupt and unusable meaning we have to start all over. We have therefore set up an error handling when reading from this data source.

Setting up a try/catch in Talend

  1. Create a context variable that we call continueLooping. This boolean will be used to end our loop when we reach our maximum number of attempts or the connection has been successful
  2. Add a tJava where you initialize the variable to true
  3. Then add a tLoop as a While and condition context.continueLooping
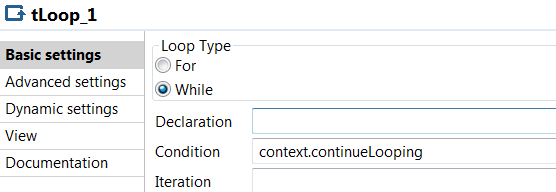
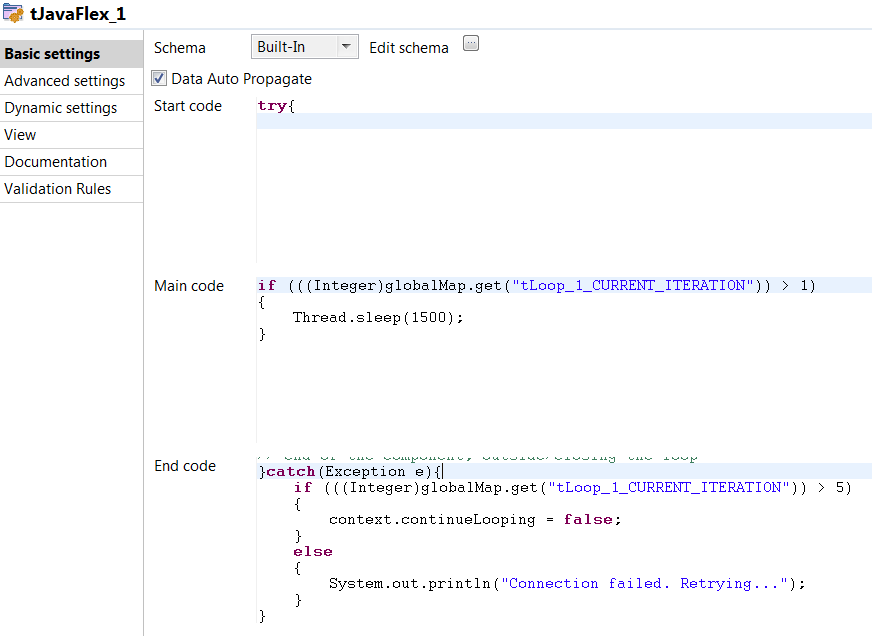
  4. Now we add a tJavaflex where our try/catch block will be. Put the try block in the start code and the catch block in the end code. Mine look something like this. Feel free to add some logging in here as well so you can keep track of where the error is happening. in the main code I make the job sleep for a little while in order to give our connection some time to get back up.
  5. Add a tJava with a “On component Ok” trigger on your database connection. Here set the continueLooping to false to stop the loop.

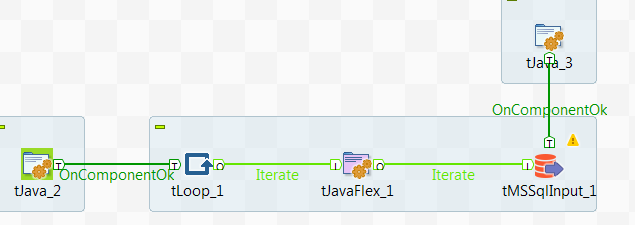
In the end it should look something like this:
Extending the error handling

In our case we are already looping our read by using a job above this one to read data one month at a time. The output of this job is large .csv files which we then upload to Azure blob storage in order to use Polybase to finally move the data into our SQL DWH data warehouse. Since we know we can loose connection in the middle of our read we need to clean up our .csv files before starting the loop all over for the month that we are reading. This is done by adding an If trigger on the tJavaflex where our trigger is to check which iteration we are in. If we are not in the first iteration of our loop something has gone wrong and we need to do some cleanup to make sure our data is correct in the end. We therefore remove all rows for the month we are supposed to read before we let the loop start over. Now, the only way I have been able to do this is by creating a copy of our existing file, filter out rows for current month and then write it back as the original file. In the end it looks like this:

Overall it seems to work very nicely when we are unable to trust that our data source will keep our connection open for the whole duration.
Tracking myself in 2017

2017 is here and once again I’ll have a goal of writing here at least one time every month. Last year I failed this goal, but this year? Let’s give it another go.

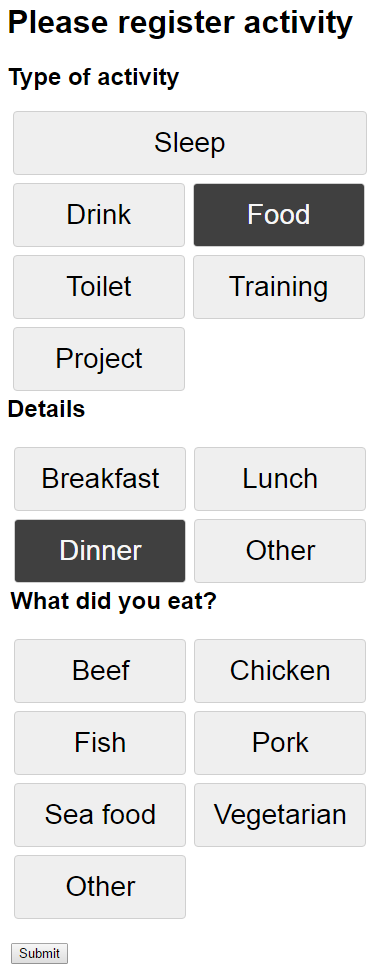
I have a list of projects I want to do and I’ve finally started to track what I am doing every day. I’ve thought of this for a while as I think it would be interesting to see if I am able to find out if there are parameters in my life that affect things like my mood and evergy level. To do this tracking I’ve made a very simple website that is hosted in Azure with an Azure SQL Database behind to store my data. This was needed to make the registration as easy as possible. I had an Excel sheet the first couple of days before I got this site up and running, and I would not recommand that approach at all if you’re going to do the same. It is a too big effort to open an excel sheet every time you drink something or whatever you want to register. So far I am very happy with how it is working out, but I have started to get quite the backlog of increasing size with ideas for improvements. I have told myself to not change anything during January and then do an evalutation of how I think it is working out and which changes are absolutely needed. I’ve also decided not too look at any of the data until January is over. I don’t want to be too aware of what I am logging in the beginning, but rather try to make logging into somethig I just do and then when I have some months of data I can see if something sticks out from them.

So far I have split registration into two parts. First part is activities during the day. Things such as what I eat, drink, if I work out and for how long etc. The other part is a registration I do at the end of each day. Here I note down my mood, energy level, stress level and overall feeling as well as some small notes about f.ex if I hang out with friends during the day or did 100 math puzzles on an app I downloaded. As mentioned I am hoping to see if there is something that affects f.ex my mood and I am able to more actively apporach these things in the future. Not really sure if this will pop up, but at least I’ll have some more data on myself and what I do during the day.

Ever done something like this or have ideas of things that are worth noting down during the day? Let me know. I know some people take these kind of things to the extreme and I probably won’t do that, but I’m always interested in new input or ideas.

Note at the end: I really like how easy it is to create a web app in Azure and everytime I now do a push to my master branch in my Git reposit the website updates within seconds. Easy to set up a Visual Studio Team Services account and create the reposit to start working right away.

Activity registration

Part 2: Real time dashboard using a Raspberry PI and Power BI

Part 2: Using the Power BI API to make a real time dashboard

So you have set up your Azure Active Directory and created a Power BI provision for your organization? If not, you can have a look at part one of this series.

Before we start playing with the Raspberry PI let’s create a simple console application to see that we have set up things correctly in Azure Active Directory in the last post and are able to have real time updates on a dashboard in Power BI. Nothing advanced, but it is a nice test to see if we have set everything up correctly with our Azure account and Power BI. What we will do is create a dataset if it does not already exist in Power BI and insert rows of data into that dataset which will then update the dashboard in real time.

Creating a Power BI application

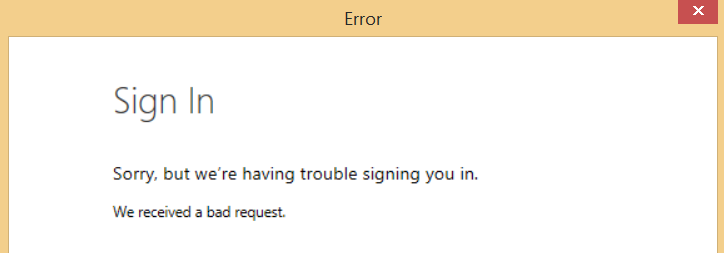
If you want to take the easy way out to see if you have set up everything correctly you can download a test code made by the MSDN team on github here: https://github.com/PowerBI/getting-started-for-dotnet. After downloading this code you need to insert your own Client ID that you get from your application page in Azure. You also need to set the redirect URI to the same as your application, if you don’t do this you will get an error message like the one below.

BadRequest

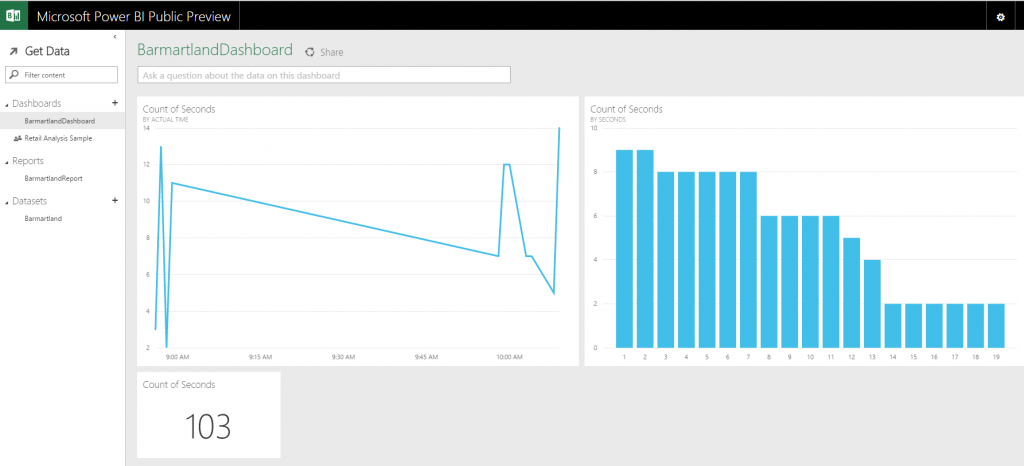
When you run the code you will see a green star-thingy appear to the right of your newly created dataset. After the dataset is created you can go and explore that dataset, even if it’s empty, and create a report. From the report you then pin report elements to a dashboard and when you run your application you will see the elements update real time. Nice!

NewDataset

I would suggest that you, either if you choose the easy way out or make a new application  from scratch, do some playing around and create your own dataset and insert some rows into it so you get a better understanding on what is happening and how the Power BI API works. Getting a good understanding of how datasets and inserting rows work will be useful later. We will not be able to reuse the dataset in the example code when using our Raspberry PI so we need to be able to create our own datasets, turn them into JSON and then insert some data. What you create is completely up to you and your imagination. I made a new application from scratch with a simple timer that  every second writes how many seconds it has been running, along with a timestamp, to Power BI. Does it provide great insight? Do I change how we look at this world? No, but it has provided me with some valuable hands on experience with the Power BI API. Other examples I’ve seen people doing is for example looking at clicks on a website and what device the clicks come from. Again it is completely up to you what you want to do.

Next up we will start to play with the Raspberry PI and then connect it to Power BI.

Dashboard

NOTE: When writing to a Power BI dataset there is, at the point when this post was written, no option to export a dataset from the Power BI Preview. This means that if you want to be able to use the data in another format than Power BI you need to store it another place as well. I am going to create an Azure SQL Database to store my data when using the Raspberry PI in case I want to use it other places other than PowerBI. Maybe you should consider doing the same?

Other parts of the series can be found here:

Part 1: Real time dashboard using a Raspberry PI and Power BI

Part 1: Real time dashboard using a Raspberry PI and Power BI

Part 1: Setting up Azure Active Directory and registering your application

When the Power BI preview finally was released I was really intrigued by the Power BI API which among other things allow you to create dashboards that are updated in real time. Now, I am expecting my first child in under a month now and I thought that why not combine my background in cybernetics and embedded systems with my present, business intelligence. I have bought a Raspberry PI and I invite you to join my mission to hopefully create a baby sound monitor that will be updating a Power BI dashboard in real time to show how often, how loud and how long my baby is crying. Hopefully we will have a quiet baby that never screams and I’ll have to use this for registering baby laughter instead, but who knows right? You might not have a baby on its way, but maybe you have some other IoT project you want to do or just want to try out the Power BI API. Either way you’re invited to embark on this journey together with me!

I will make this into a series of post, but the journey starts with setting up your Azure Active Directory and getting to know the Power BI preview where a dashboard will get updated real time using the Power BI API later. In order to use the Power BI API you need to register the application you will be making in your Azure Active Directory. I also made a new user that I am going to use for my Power BI site.

Creating an Azure Active Directory

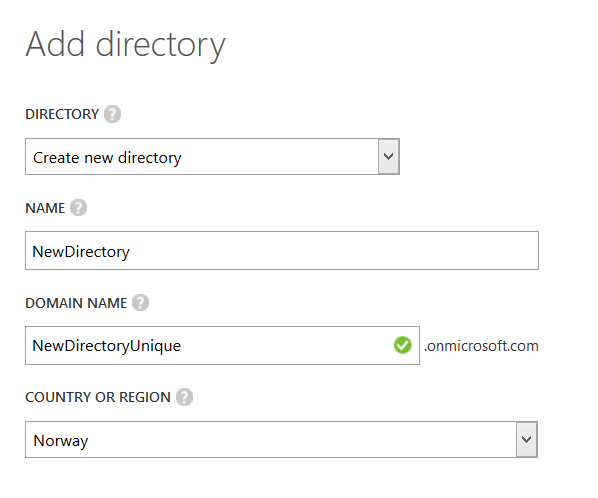
When you log into your Azure Management Portal you will find Active Directory on the navigation bar on the left. Click on Active Directory and the new button, choose App Services, Directory and click on Custom Create to create a new AD. Give it a name, a domain name and select the country for your directory. The country can’t be changed after the directory is made and affects which data center your AD will be located in so choose wisely, or just go with the country you’re in as I did.

NewAD
AddDirectory

When your directory is created it will show up under your Azure Active Directories. I have made a new user that I am going to use with Power BI and then signed up for a preview over at www.powerBI.com using this user from my Azure Active Directory. It might take some time to get a Power BI provision up for your Azure Active Directory  organization so I would do this step before you read the rest of this post.

Registering your Power BI app

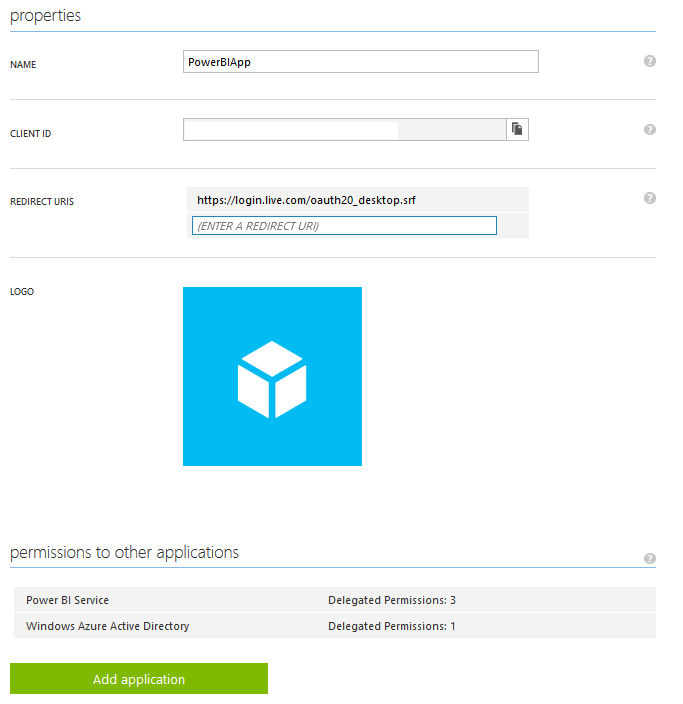
Before you can create your Power BI application you need to register your app in your Azure Active Directory. Click on the directory you created, go to applications and press add. You want to “add an application my organization is currently developing” and you want it to be a “native client application”. You are asked for a redirect URI where you can use https://login.live.com/oauth20_desktop.srf. Make sure when you start writing your program to use the same redirect URI in your code.

When your application is up you need to set some permissions for it. Click on your application, go to configure, scroll to the bottom of the page and press Add Application. Select “Power BI Service” and close the window. Power BI Service will show up under “Permissions to other applications”, but before you are done you have to check all three checkboxes in the dropdown “Delegated Permissions”.

PowerBIPermissions
PowerBIPermissions2

And with that step: Congratulations! You are now ready to copy/paste the Client ID from your application and start using it together with the Power BI API. We will continue on that later. Feel free to play with the Power BI preview as well to familiarize yourself by f.ex uploading an Excel file as a data source and make some reports and dashboards. Personally I am looking forward to having more visualizations as I almost felt the word preview should have been emphasized more in this Power BI preview.

PowerBIProperties
Other parts of the series can be found here:

Part 2: Real time dashboard using a Raspberry PI and Power BI